Day One - Tuesday
Once again I'm on what is known locally as the GOR, the Great Ocean Road which stretches (arguably) from Torquay through to Point Nelson in the states west. Officially it's shorter than that but in reality it keeps going into South Australia for ages.My goal this trip is to get shots of Wreck Beach that I'm happy with, I've never come away with shots that make me properly pleased with the results.
On Friday morning I'll be on the beach before dawn... but in the mean time I'm camped out at my usual base and trundling around exploring and shooting.

The setting sun highlights the amazing harsh coast line where the Southern Ocean slowly makes Australia smaller. Many ships were wrecked along this forbidding line of tall cliffs. This is shot from the end of one of the many dirt tracks that take the intrepid away from the bus loads of tourists and the city drivers who can't stand the idea of a dirt track. This view shows Lochard Gorge and the 12 Apostles (well about 8.5 of them) in the distance. f/16 1/13th of a second ISO 50 on a 50mm prime.

This is the same location as the previous shot but somewhat later after the sun had gone and with slightly different framing but the same 50mm lens f/16 30 seconds ISO 50. For best results keep your ISO low and expose for the surroundings. This long exposure really captures the might of the ocean as it slowly beats Australia into submission. Even sitting here in my van typing this blog I can hear the waves crashing on the beach over 1km away from me. The Southern Ocean is not to be trifled with. Even in calm weather like today these waves broke half way up the cliff.

Even after dark there are still shots to be had. This is a crop at 1:1 of a very small area of the image showing the sea mists back lit by the sky still slightly glowing from the setting sun. As +Lady Fran W put it this is like a pirate movie. I can see her point, you can almost expect the fulsom figure of the carved wooden maiden adorning the bow sprit of a tall ship to come into view as she rounds the rocks heading in for a secret rendezvous for the purposes of smuggling. 85mm f/16 13 seconds at ISO 125.
On reviewing my shots today I could see the results of coming here so many times. I shot only a few and of those I'm happy with all of them. I'm coming to know this area well and know what I want before I shoot and I've learned over many trips how to get the outcome I'm looking for. On this trip apart from Wreck Beach on Friday morning where sunrise, weather and tides all come together at the right moment I have no plans and will take each day as it comes.
Finishing up these images and this blog entry while I wait for my back up to finish I listen to the rain falling on the roof of my van and think of the other Melbourne photographers camped nearby in their tents. Keep warm folks. It's an early start on Gibsons Steps tomorrow to capture the early morning light on the nearby Apostle and hopefully catching up with a local.
12mm fish, 1/160th f/11 ISO 100

The little things matter. While climbing back up Gibson's Steps I noticed this little bush growing on the rocks backlit by the sun. A heavy sea mist in the air made for some nice flaring.
1/600th f/4 85mm ISO 400

While exploring around the timber railway trestle bridge (now rail trail) near Timboon I found this small waterfall on a creek that runs parallel to the former railway. Worth getting the feet a bit wet for this scene.
12mm fish f/11 0.5s ISO 50

Still standing after some TLC from Puffing Billy Railway the railway trestle at Timboon stands proud supporting the rail trail.
12mm fish, 1/30th, f/11 ISO 50

The serenity of the Australian rural scene is often amazing and breathtaking. It's worth pulling over from time to time when you spot something. Everyone fanned out looking for their shot. This one is mine.
12mm fish, 1/125th, f/11 ISO 100

After enjoying a lunch with friends at Timboon we parted company with Kathryn and headed back to our camping at Princetown. It was great to meet another g+ person +Kathryn van Nieuwkerk . In this image are back row - +Paul Pavlinovich +Trace McLean Stef +Peter Sherriff +Kathryn van Nieuwkerk and +Shari Mattox
We had lunch at the distillery and I can't say I recommend it. The service was good. The food was ok but the prices were high for what was essentially pub food. They may aspire to higher foodie paradise but they don't quite make it. Oh and their whiskey? I'll stick with my usual I think. Very expensive ($125 for 500ml) and nothing to write home about.

On the way back the evening light became interesting and we paused several times on our journey to explore and photograph our surroundings. This grass seed silhouette intrigued me. I played around with the landscape in this area but was not happy with the shots. They don't feel quite right. I'll come back to them later.
85mm 1/640th f/11 ISO 100

We headed along part of the Old Ocean Road in Princetown along the Gellibrand River. We found this amazing white bird. I had to push up the ISO to capture his flight in the fading gentle evening light. It's always worth getting off the tourist drag of the main road. There is MUCH more to be seen in this area by simply hitting the dirt.
85mm 1/400th f/5.6 ISO 800

Finally at the end of the day, the sky put on a magnificent show over the flood plains and wetlands alongside the Old Ocean Road in Princetown.
I've seen this area well and truly inundated - the camp ground is on this plain but it's elevated slightly so it's unusual for it to flood but I've seen the road in and much of the grounds wet and sloshy in the past. This usually only happens if the mouth of the Gellibrand gets closed off by a storm.
12mm fish 1/4s f/11 ISO 50

What will tomorrow bring? Well you know that as much as I do. No plans, I'll just jump in the car and go someplace. Something will jump out and magic will happen.
I might explore a bit more around Timboon and the Otway National Park.

In search of mossy rocks and falling water I trekked down to the Elliot River where it runs into the Southern Ocean. Up stream from the mouth reached by good old fashioned bush bashing was a small but magic waterfall. I had to wade through the river to get close enough for the final images of the falls.
12mm fishie 0.5 seconds f/16 iso 50

Onwards and upwards to Mariner Falls. These falls are currently "closed" but the sign said public "should" keep out. Well, that's not a no in my book. That leaves the decision to me and I decided to go. Very well worth the trek and apart from needing to cross the river by wading from time to time an easy walk. The falls are in a natural amphitheatre bowl.
12mm fishie 1 second f/16 iso 50
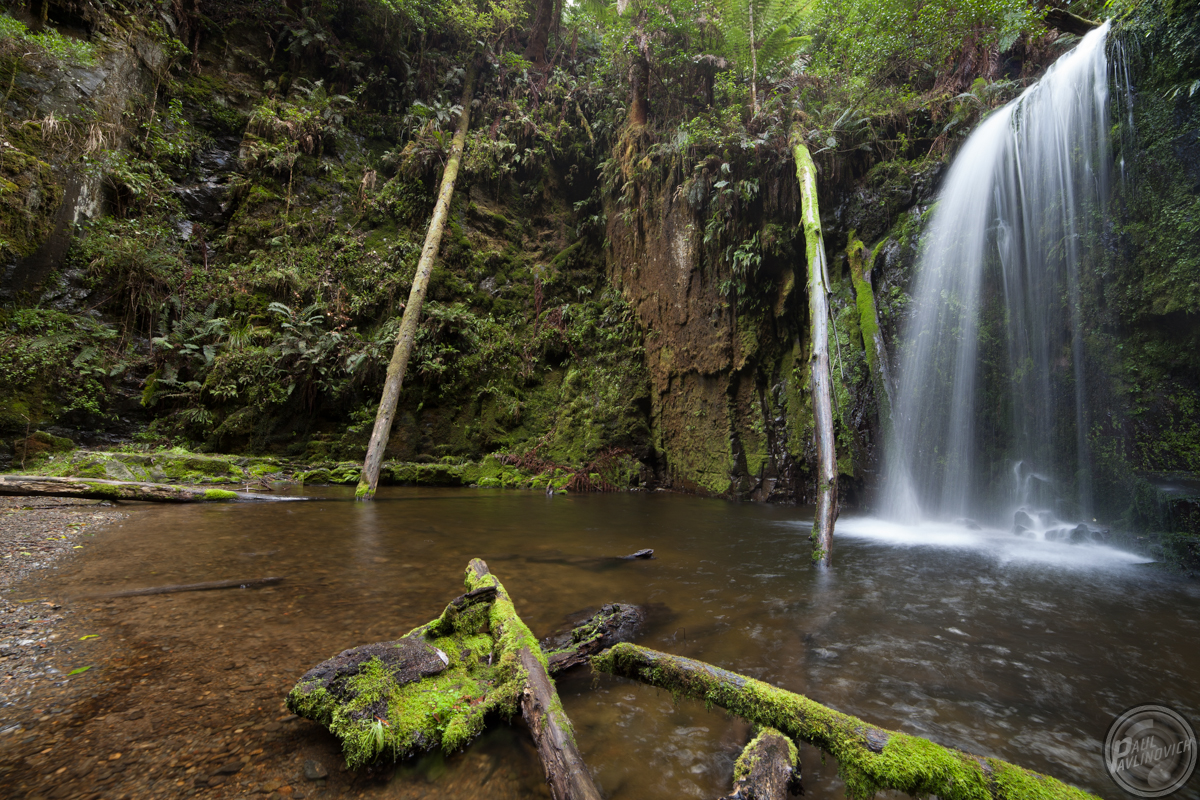
Near Mariner Falls I waded into the river on a few occasions to capture mossy rocks. I like mossy green rocks in nice natural light. No idea why, I just do.
12mm fishie 1.3 seconds f/16 iso 50

On the road from Apollo Bay to Beech Forest is a California Redwood Sequoia grove. They were planted in the 1930's as an experiment and they are truly magnificent today. Even though these are giants they are but babies compared to some I saw in their natural home. There is no sound at all in the forest. It's simply silent.
12mm fishie 15 seconds f/22 iso 50

The final stop for the day and the last shot that this fishie will ever take before it is repaired. This is Hopetoun Falls. I had hoped to get here last trip but the storm tore up the joint and there were police keeping people away at the road entrance. This time round I make the climb down the stairs and made it all the way to the falls. While out there I slipped and fell. The camera and the fishie hit a rock. The camera survived with nothing more than a new battle scar but the fishie, well it kind of exploded. I've managed to put it back together for tomorrow with glue and tape. It's now jammed about f/11 or so until I can get it properly repaired.
12mm fishie 1.6 seconds f/16 iso 50

Day Two - Exploring
Naturally visiting the 12 Apostles has to be done sooner or later when visiting the #gor - best seen in the early or late afternoon for the best light minimising the contrast between sky water and rock to allow normal exposures.12mm fish, 1/160th f/11 ISO 100
1/600th f/4 85mm ISO 400
While exploring around the timber railway trestle bridge (now rail trail) near Timboon I found this small waterfall on a creek that runs parallel to the former railway. Worth getting the feet a bit wet for this scene.
12mm fish f/11 0.5s ISO 50
Still standing after some TLC from Puffing Billy Railway the railway trestle at Timboon stands proud supporting the rail trail.
12mm fish, 1/30th, f/11 ISO 50
The serenity of the Australian rural scene is often amazing and breathtaking. It's worth pulling over from time to time when you spot something. Everyone fanned out looking for their shot. This one is mine.
12mm fish, 1/125th, f/11 ISO 100
After enjoying a lunch with friends at Timboon we parted company with Kathryn and headed back to our camping at Princetown. It was great to meet another g+ person +Kathryn van Nieuwkerk . In this image are back row - +Paul Pavlinovich +Trace McLean Stef +Peter Sherriff +Kathryn van Nieuwkerk and +Shari Mattox
We had lunch at the distillery and I can't say I recommend it. The service was good. The food was ok but the prices were high for what was essentially pub food. They may aspire to higher foodie paradise but they don't quite make it. Oh and their whiskey? I'll stick with my usual I think. Very expensive ($125 for 500ml) and nothing to write home about.
On the way back the evening light became interesting and we paused several times on our journey to explore and photograph our surroundings. This grass seed silhouette intrigued me. I played around with the landscape in this area but was not happy with the shots. They don't feel quite right. I'll come back to them later.
85mm 1/640th f/11 ISO 100
We headed along part of the Old Ocean Road in Princetown along the Gellibrand River. We found this amazing white bird. I had to push up the ISO to capture his flight in the fading gentle evening light. It's always worth getting off the tourist drag of the main road. There is MUCH more to be seen in this area by simply hitting the dirt.
85mm 1/400th f/5.6 ISO 800
Finally at the end of the day, the sky put on a magnificent show over the flood plains and wetlands alongside the Old Ocean Road in Princetown.
I've seen this area well and truly inundated - the camp ground is on this plain but it's elevated slightly so it's unusual for it to flood but I've seen the road in and much of the grounds wet and sloshy in the past. This usually only happens if the mouth of the Gellibrand gets closed off by a storm.
12mm fish 1/4s f/11 ISO 50
What will tomorrow bring? Well you know that as much as I do. No plans, I'll just jump in the car and go someplace. Something will jump out and magic will happen.
I might explore a bit more around Timboon and the Otway National Park.
Day Three - A few waterfalls and a smashed fishie
Today started like any of my photography trips, up early hunting for images. I found these kangaroos on the hop right outside of the door to where I'm camping.
On the hop in the early morning light in the paddock adjacent the camp ground. There were hundreds of them today.
400mm 1/250 f/9 iso 2500
In search of mossy rocks and falling water I trekked down to the Elliot River where it runs into the Southern Ocean. Up stream from the mouth reached by good old fashioned bush bashing was a small but magic waterfall. I had to wade through the river to get close enough for the final images of the falls.
12mm fishie 0.5 seconds f/16 iso 50
Onwards and upwards to Mariner Falls. These falls are currently "closed" but the sign said public "should" keep out. Well, that's not a no in my book. That leaves the decision to me and I decided to go. Very well worth the trek and apart from needing to cross the river by wading from time to time an easy walk. The falls are in a natural amphitheatre bowl.
12mm fishie 1 second f/16 iso 50
Near Mariner Falls I waded into the river on a few occasions to capture mossy rocks. I like mossy green rocks in nice natural light. No idea why, I just do.
12mm fishie 1.3 seconds f/16 iso 50
On the road from Apollo Bay to Beech Forest is a California Redwood Sequoia grove. They were planted in the 1930's as an experiment and they are truly magnificent today. Even though these are giants they are but babies compared to some I saw in their natural home. There is no sound at all in the forest. It's simply silent.
12mm fishie 15 seconds f/22 iso 50
The final stop for the day and the last shot that this fishie will ever take before it is repaired. This is Hopetoun Falls. I had hoped to get here last trip but the storm tore up the joint and there were police keeping people away at the road entrance. This time round I make the climb down the stairs and made it all the way to the falls. While out there I slipped and fell. The camera and the fishie hit a rock. The camera survived with nothing more than a new battle scar but the fishie, well it kind of exploded. I've managed to put it back together for tomorrow with glue and tape. It's now jammed about f/11 or so until I can get it properly repaired.
12mm fishie 1.6 seconds f/16 iso 50
Tomorrow Wreck Beach and who knows what else. The last full day of the trip.
Day Four - Getting Wrecked
I met up again with +Trace McLean and Stef early this morning on Moonlight Head to make our way down to Wreck Beach. Well, actually they got there an hour early and went without me... We met on the beach and did a mad dash in and out of the waves to capture the anchors and surrounding rock formations.
In the early light I did some long exposures to capture the anchors appearing out of the spooky "mist" .
24-105 @ 105mm f/22 with black glass 30 seconds ISO 50

The anchors are welded into the rock by the force of the many storms, the first of which jammed them in there. They both sit within circular holes. A line of holes lead to the most prominent anchor. These circular holes are always the ones that are most noticeable in Wreck Beach photographs. They used to have a brilliant verdant green moss growing on them but it wasn't there this time. The rocks seem to have been scrubbed clean.
50mm 1/250th f/11 iso 50

I diced with the Southern Ocean many times before just giving up and letting it soak me while continuing to photograph. This made it much easier and more productive and I need new boots anyway since these ones had started to fall apart. They'd done a lot of km and will do some more yet but this will be one of the final nails in their coffin. One day I'll just go there in shorts and crocks. Wet up my balls in the sea on a photo expedition... what a surprise.
50mm 1/80th f/10 iso 400

Once the sun comes up properly and highlights the anchors they're much less creepy but no less poignant as they symbolise the loss of life on what is known locally as The Shipwreck Coast. Many vessels were smashed to pieces along this coast. Generally when this happened all souls were lost except in a few very lucky cases.
50mm 1/6th f/22 iso 50

Once the sun came up Wreck Beach got less interesting not to mention the tide was on the way in and I was wet enough. Off back to camp ground via the Old Ocean Road. I'm sure I've mentioned when on the GOR that you should take every opportunity to get off it to escape the tourists. They drive really slowly and really badly. Following the Old Ocean Road isn't quicker but it's soothing and much nicer to look at.
12mm fishie (repaired, sort of) 1/100th f/11 (I think) iso 50

While off the road you'll see many coastal rural scenes including the ubiquitous windmills. These beasts creak and strain as they spin in the breeze to pump up water from the wells or in this case the nearby creek. In this area there were major local makers in Warrnambool and Colac both very nearby so it's unusual to find not one but many Queensland made Southern Cross mills in abundance. The local dealer must have made great deals with the farmers to get so many of them out there despite the local competition.
12mm fishie 1/80th f/11 iso 100

This has to be the creepiest road of all time with those trees bending over to try and get you. I could only imagine what it would be like in the early dawn light especially if there was a light mist at ground level. Spooky.
12mm fishie 1/160th f/11 iso 640

After lunch I went for a cruise to Ayre River (or is it Aire River?) anyway... I didn't have any plans as I'd hit my target sites for this week, not to mention my boots were still soaked so I needed places I could go in Ug Boots without getting laughed at. Turns out that's about everywhere around here. Down by the two camp grounds that are separated by a bridge and personality (bogans with massive fires, guns, music and loads of booze on one side and the families and quieter back packers on the other side) I found a couple of girls going out for a paddle. Well they would but they were simply going around and around in circles while their dad yelled "encouragement" to them from the bridge.
400mm (200 + 2X extender) 1/400th f/16 iso 1000

On the way back up the hill I stopped to chat up this beautiful bird who was showing off by the side of the road. I was pretty lucky to get this shot hand held resting on the door sill.
400mm 1/80th f/16 iso 1000

Even hideous English Bracken (why did those dick heads bring so much stuff that has invaded and destroyed so much of this land?) looks good back lit with a ray of sunlight shafting down through the overhead canopy.
330mm 1/500th f/5.6 iso 2500

Leaving the river I decided to shoot some bull with a local man who was working in his field. The diversity of the farming around here is phenomenal they have both kinds. Cows and sheep.
400mm 1/500th f/9 iso 400

After a while I thought I'd take in a lawn bowls match being played by giants on the green of the pitch alongside the river along The Old Ocean Rd near Princetown.
400mm 1/160th f/9 iso 400

This image reminded me of this morning trying to stop my berries from getting wet. Such simple subject becomes quite magic with a limited depth of field and shot up close with a telephoto lens. As I type this entry I can't help but hear the conversation between the two girls in the bongo van camped next to me. One of them is crying and the other is continuing to explain that she doesn't feel "that way" towards her at all and is sorry she ever came along on the trip. I'm tipping an early end or a very awkward few days along the coast for these two.
400mm 1/60th f/5.6 iso 400

As the last of the light started to die in the thick clouds (no nice sunset tonight) I came across this group of swans floating around on the swamp. This same swamp produces the massive mozzies that frequent the rich persons camp ground above where I stay and attack +Peter Sherriff .
400mm 1/640th f/7.1 iso 2500 balanced on a fence post

Every day should end with a little weed. This grass/reed seed was highlighted from behind with the last of the receding light before the world went grey and I gave up and came back to the van to watch a movie.
400mm 1/500th f/7.1 iso 2500


